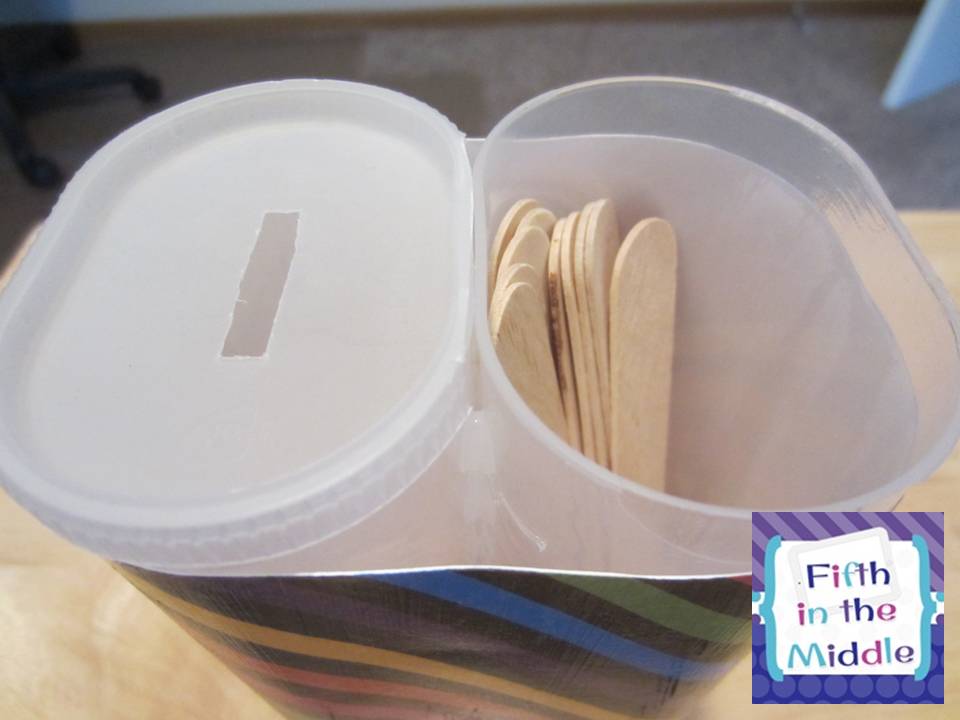
I pull names throughout the day for various things. I'm sure that many of you do the same. I used a mug to hold the sticks for the first thirteen years, and I rubber-banded together the sticks for the other class that I saw once a day. This year, my mug wasn't big enough for three classes, so I bought little buckets from THE dollar spot.
They worked fine. They were a little awkward. I probably could have put all three classes into one and just used rubber bands again. Anyway, occasionally I would have an issue with putting a stick down somewhere or having a pile of sticks on my table or sticks falling to the floor.
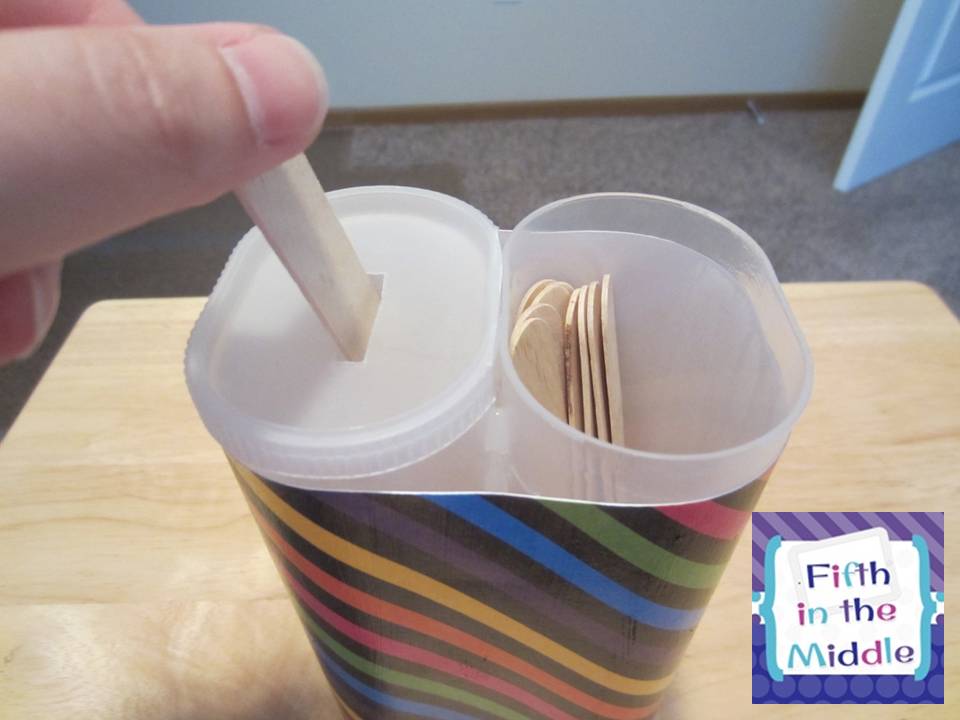
So this idea is brilliant! You take a stick out of one side, then place it into the side with the lid. When you are out of sticks, switch the lid to the other side and start over. Genius! No more misplaced sticks or stick piles!
 |
| Draw a stick from the open side. |
 |
| Place the drawn stick in the side with the lid. |
 |
| When all sticks have been drawn, switch the lid to the other side. |
 |
| Ready to draw names! |
Then I trimmed some scrapbook paper to 5 3/4" tall. I ended up using the extra paper to fill a gap on the end because the paper wasn't quite long enough.
I Mod Podged the paper onto the containers and then used a spray-on sealant to reduce the tackiness. I know that the blog where I found this idea just used a ribbon, but sometimes I draw sticks and want to keep it a {secret}. The opaque containers weren't secretive enough, in my opinion. Thus, the scrapbook paper comes into play.
For the lids, I made two different versions since I had two lids. The one on the right has a 1"x1/4" slit in it to fit the larger craft sticks. The one on the left has a starburst cut in the middle. I'll figure out which one I like better. I think that the one on the right is in the lead. The one of the left makes a wood-on-plastic noise when I pass the stick through.
UPDATE: When I cut the slits in the lids, I started by taking my exacto knife (or you could use a pin) and made little dots to outline it. If I just started cutting with the knife, the cut spread like a crack on a windshield. I learned to go slow and make little cuts first. Hope that helps!
Since I glued the two containers together, I made a little notch on the side of the lid so I wouldn't have to worry about getting the lid between the two containers to make it fit. The picture shows the lid before I made the slot in the top. Also, the blogger who was the source of this idea also wrote something on the lid so she would know which side was which. I think it's fine without it.
I made three, one for each class. I will use my new Silhouette Portrait (when the hard drive on my laptop has been recovered) to put a label on each of the wider sides, but I can't decide if I'm going to put on a number for the hour I have the class or the initial of the class's homeroom teacher. I'm trying to decide which would be more constant from year-to-year. Probably the homeroom teacher's initial.


Such a great way to keep the sticks organized. In the past I've turned them upside down once I called that number, but I like this idea too! Another summer project! If you do decide to do a Rafflecopter, I'd love to participate!
ReplyDeleteBrandi
Success in Second Grade
Ahhh I love that idea! I use name sticks all the time and just keep them in a baggie and it is totally NOT functional! This would work much better!
ReplyDeleteBethany
FabandFunin4th!
I love this idea! It's a much nicer way to draw sticks and keep them separate.
ReplyDeleteGreat idea! Thanks for sharing and giving the step by step process!
ReplyDeleteMary
Teaching Special Kids
Super cute idea!! :)
ReplyDelete~Brandee
Creating Lifelong Learners
Way too cute! I liked the lid on the right, if you're taking votes.
ReplyDeleteI guess I should start drinking Crystal Light :)
ReplyDeleteThanks for the detailed instructions, yours turned out great.
Very clever diy - I have a friend who regularly drinks Crystal Light, so I'll ask her to save me a few of these! Denise www.playlearnteach.org
ReplyDeleteTerrific idea! I guess my daughter and I had better drink some crystal light this summer. Thanks for sharing.
ReplyDeleteKelly
I'm Not Your Grandpa, I'm Your Teacher
Another fantastic idea! I think I'll be shopping for some of the larger Crystal Light containers (and I guess drink the stuff, too). Thanks for linking up :)
ReplyDeleteElizabeth
Fun in Room 4B
Love it! I will have two classes next year, so I'll be making two of them. I have some fun duct tape begging to be used for this. I can't wait!! Thanks for posting your steps. :)
ReplyDeleteOMG...this is great! I want to do this!!!
ReplyDeleteTonya
Tonya’s Treats for Teachers
This is a great idea! I'm definitely adding it to my list of things to make for my classroom for the upcoming year! Thanks for sharing :-)
ReplyDeleteStephanie
Crayons & Storybooks
http://crayonsandstorybooks.blogspot.com/
Brilliant! I have all my sticks (I use the large coloured ones) in an apple juice tin on my desk. I put an empty toilet paper roll in the middle (the kids can't see it) and I put the names I have already drawn inside the roll (or the names of someone I don't want to draw)! It has worked really well this year, but maybe I'll need to try your way too!
ReplyDeleteSidney
Teachingisagift
What a fantastic idea! I use class sticks, and have 3 classes, so each class is written in a different color on the sticks. I love the idea of the lid, so I can keep track of which sticks I've polled and which ones I haven't.
ReplyDeleteAshley
Fifth Grade Features
Great idea!! I am going to pin this to make. I think I will use patterned tape though because my cutting and mod podging skills aren't that great haha.
ReplyDeleteGina
Third Grade Tidbits
Love these! I seriously need to start getting those crystal light containers! They are perfect for everything!
ReplyDeleteCongrats on almost 500! I just celebrated 500 on my blog and it was so much fun! Let me know if you need any help!
The Polished Teacher
This is a super cute idea! I love how organized it is and how it keeps all the sticks in one area! I just might have to borrow this one!
ReplyDeleteI love this idea! Brilliant! What did you cut the holes with? (I'm not always good with sharp tools...)
ReplyDeleteThanks for sharing this very easy to follow tutorial! I'm totally going to do this!
Amanda
Collaboration Cuties
Love it...and I love Crystal Light so it's a win-win for me!
ReplyDeleteThe Teacher Chick
Genius name stick holder!! I pinned this. Thanks for the awesome idea and directions:)
ReplyDeleteSo clever! I use presently use the bucket for my sticks too! :O) And, I have an entire box of Crystal Light containers-I love the peach tea!! :O) I have something I want to make this summer sshhh...but I definitely have two extra to make this genius invention! Thanks for sharing!
ReplyDelete*If you have a giveaway I'd be glad to donate friend! Congrats!
Joanne
Head Over Heels For Teaching
WONDERFUL idea! Thanks for sharing!
ReplyDeletewww.elementaryendeavors.weebly.com
Love this! Plus I'm hoarding crystal light containers and I didn't have a plan for them. Now I do :)
ReplyDeleteBrilliant idea; thanks so much for sharin'!
ReplyDeleteAlison
Rockin' and Lovin' Learnin'
Awesome idea!! Thank you so much for sharing!!
ReplyDeleteHeather
Passports to New Adventures @ http://passportstonewadventures.blogspot.com/
This is brilliant!
ReplyDeleteThis is great! I have my 5th graders pull the sticks. No duplicates of certain kids.
ReplyDeleteWhat a great idea! I pinned it so I would remember:)
ReplyDeleteThanks,
Terri
I have four classes, soon to be five, so the idea of a cute bucket to hold the different containers is great! Time to go shopping!
ReplyDeleteiTeachSTEM
This is such a great idea! :-) I have a ton of scrapbooking paper that is just crying out to be modge podged! LOL
ReplyDelete